ZoIPer for Linux Setup
1. Download and install the latest version of the program.
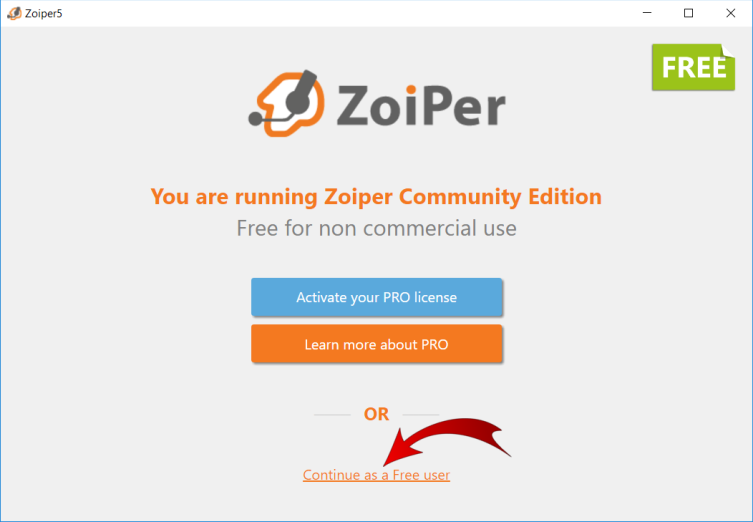
2. When a program starts, a message with suggestion to buy a paid version appears. Click Continue as a Free user (at the bottom of the page).
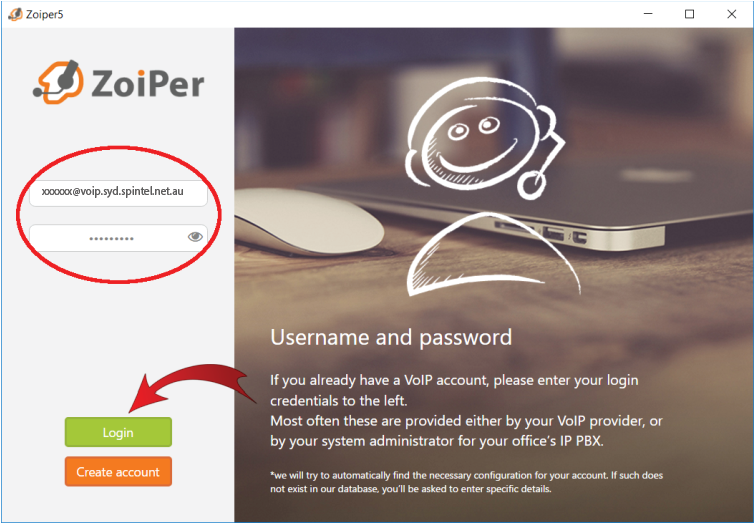
3. Use the server, login and password details from the "Settings”, “SIP Connection" section.
Username: xxxxxx@voip.syd.spintel.net.au - where xxxxxx is our sip number
Password: Your sip-number password
After you’ve entered the details, click the “Login” button.

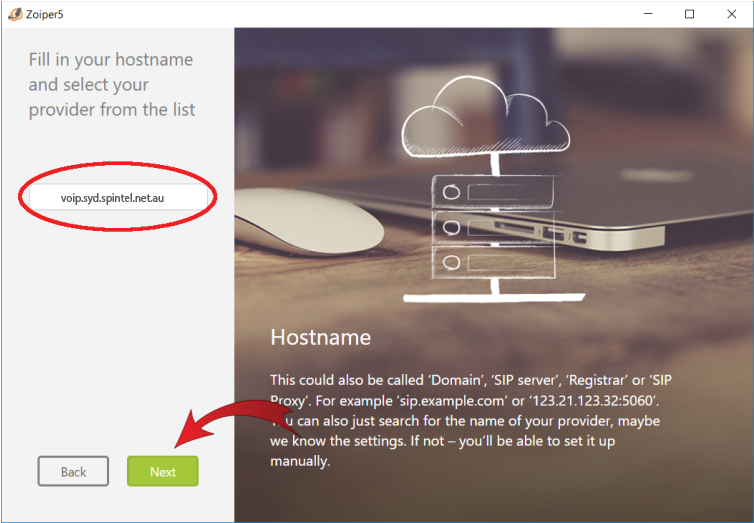
4. On the next page, enter voip.syd.spintel.net.au server address and click Next.

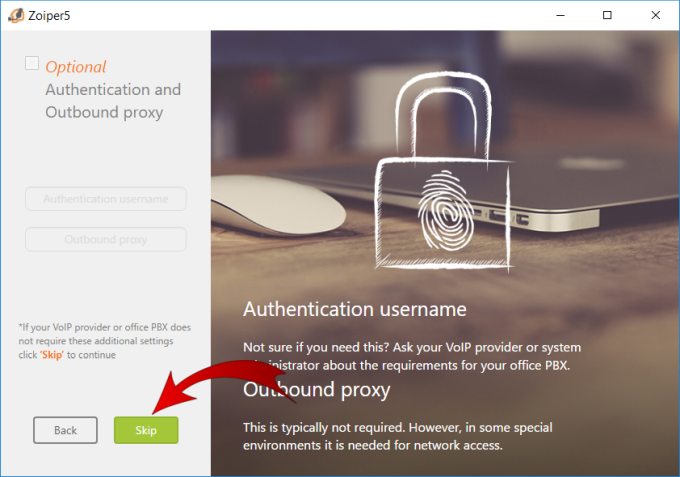
5. Click the “Skip” button
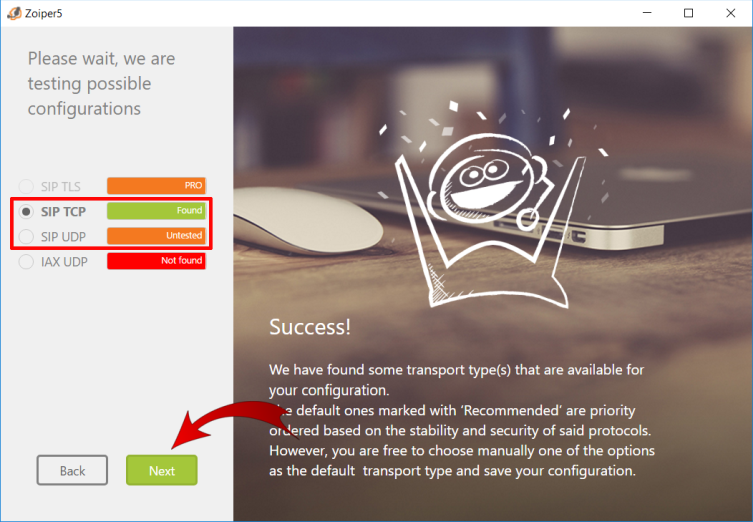
6. At the next stage, Zoiper will try to find a priority transport for your network. Select SIP UDP or select SIP TCP if the first one has the Untested status. Then click "Next".