
HT814 VoIP Configuration
1. Lift the phone and dial ***02 from the handset and take note of the IP address that will be provided via voice prompt.
2. Open a browser and type in the IP address (i.e. 192.168.1.96) or the IP address and add :88 at the end (i.e. 192.168.1.96:88)
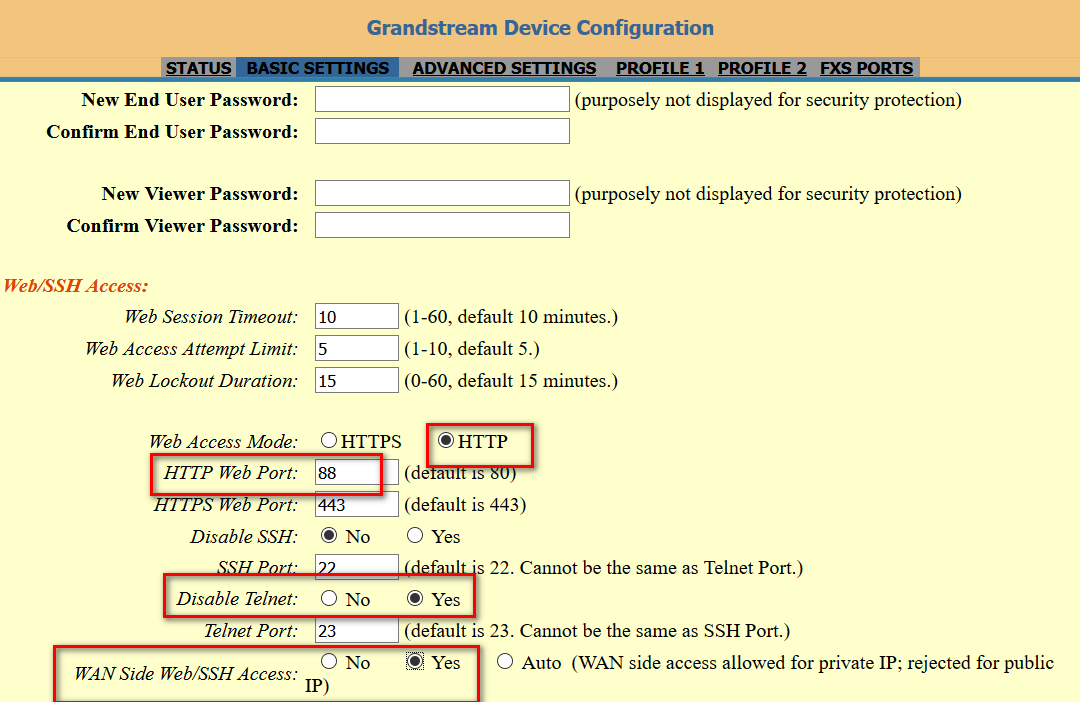
3. On the web interface, click on BASIC SETTINGS
Setup the options with the information below:
Web Access Mode: HTTP
HTTP Web Port: 88
Disable Telnet: Yes
WAN Side Web/SSH Access: Yes
Time Zone: GMT+10:00 (Sydney, Melbourne, Canberra)
Device Mode: Bridge
Enable UPnP support: Yes
Enable LAN DHCP: No

Scroll to the very bottom and then click the Update button.
4. Go to ADVANCED SETTINGS
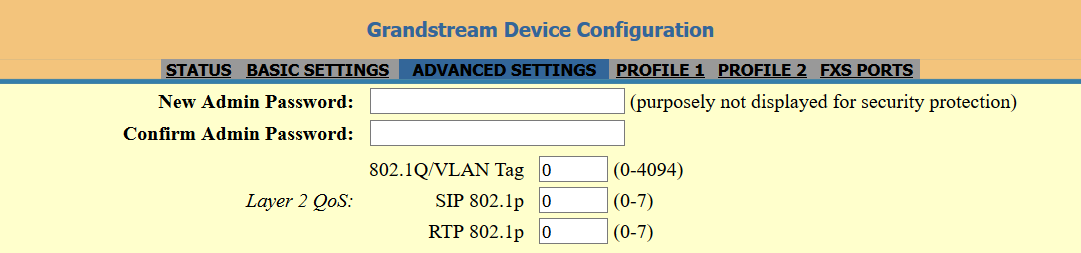
Enter the information below:
System Ring Cadence: c=400/200-400/2000;
NTP Server: 203.23.237.200
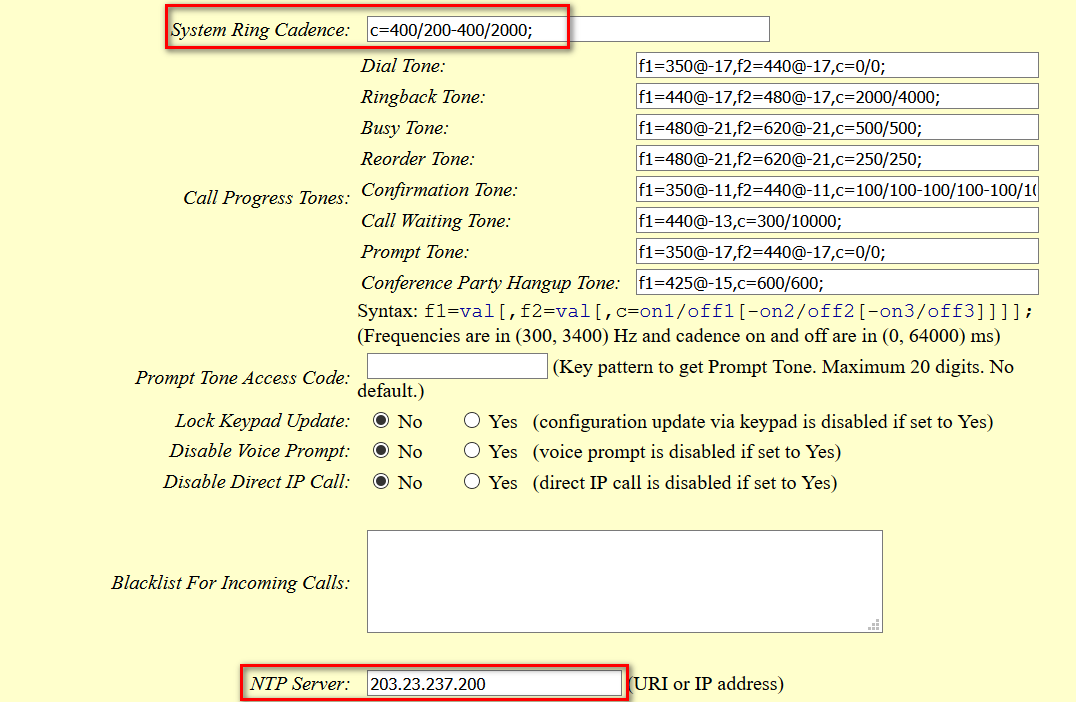
Scroll to the very bottom and then click the Update button.
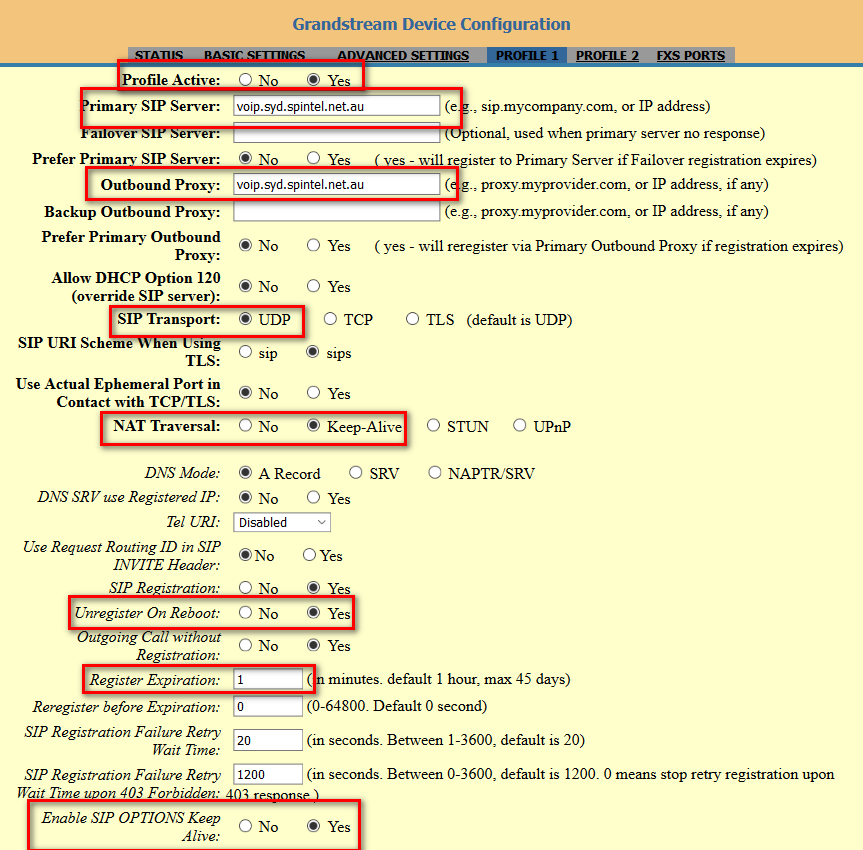
5. Go to PROFILE 1 and enter the following information and leave everything else as default.
Account Active: Yes
Primary SIP Server: voip.syd.spintel.net.au
Outbound Proxy: voip.syd.spintel.net.au
SIP Transport: Should be UDP unless 4G service then TCP.
NAT Traversal: Keep Alive.
Unregister On Reboot: Yes
Register Expiration: 60
Enable SIP OPTIONS Keep Alive: Yes

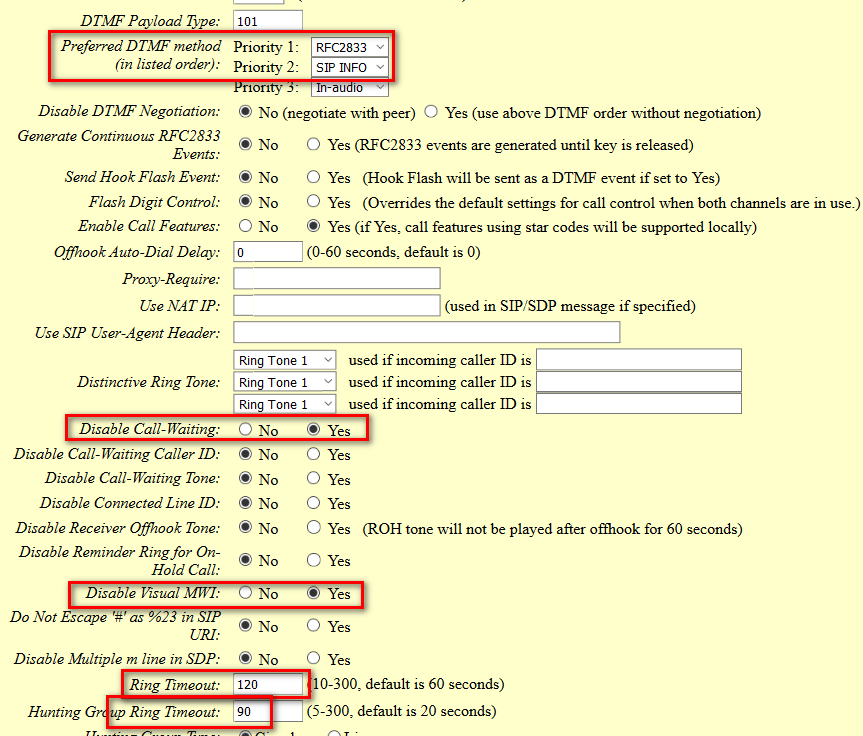
Preferred DTMF method: Priority 1: RFC2833 then, Priority 2: SIP INFO
Disable Call-Waiting: Yes
Disable Visual MWI: Yes
Ring Timeout: 120
Hunting Group Ring Timeout: 90
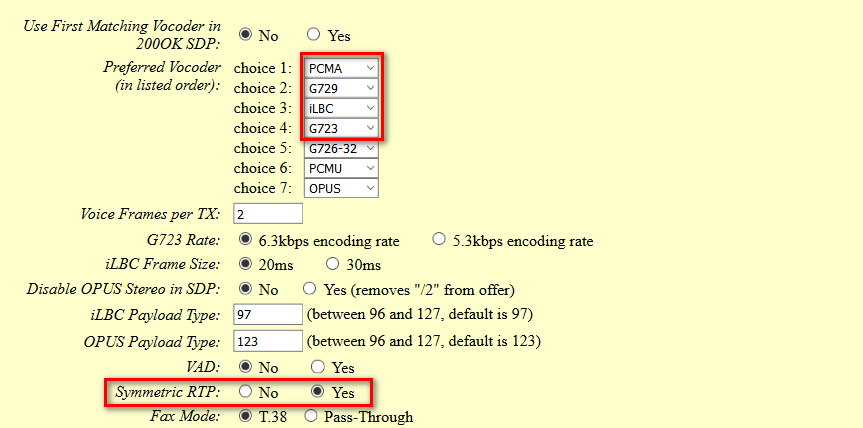
Preferred Vocoder: PCMA, G729, iLBC, G723
Symmetric RTP: Yes
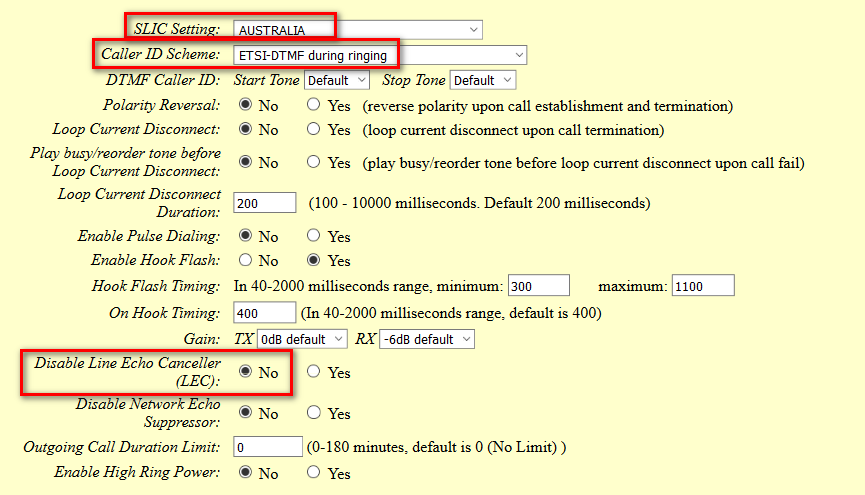
SLIC Setting: Australia/New Zealand
Caller ID Scheme: ETSI-DTMF during ringing
Disable Line Echo Canceller (LEC): No
Scroll to the very bottom and then click the Update.
Then click Reboot.
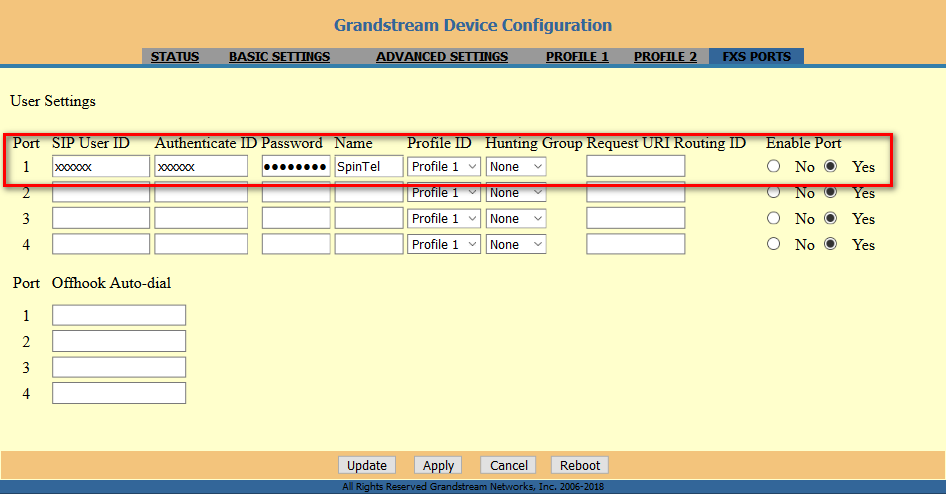
6. Click on FXS PORTS and enter the following information below:
SIP User ID: Your sip number (xxxxxx)
Authenticate ID: Your sip number (xxxxxx)
Password: Your sip-number password
Name: Your sip number (xxxxxx)
Profile ID: Profile 1

Scroll to the very bottom and then click the Update button.
Then click Reboot.