
Cisco SPA112/SPA122 Setup
1. To enter gateway web interface enter device's IP-address in the URL bar. You can attain the device's IP address by dialing ****110#
Default login and password: admin
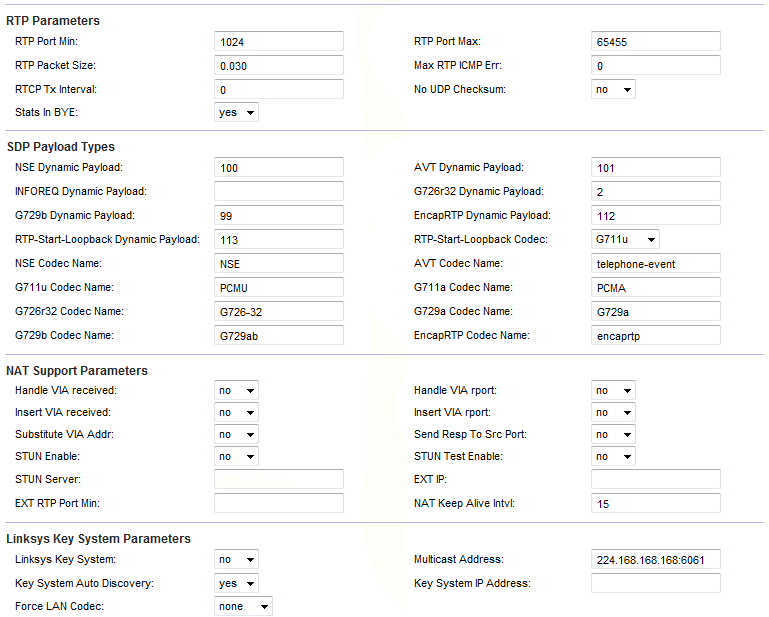
2. Open Voip - SIP and specify range of RTP ports.
RTP Port Min: 1024
RTP Port Max: 65455
3. Open Voip - Line1 and enter the following data:
NAT Mapping Enable: no
NAT Keep AliveEnable: yes
Proxy: voip.syd.spintel.net.au
Register Expires: 65455
Display Name: SIP number (xxxxxx))
UserID SIP number (xxxxxx))
Password: Your password
Preferred Codec: G711a
Second Preferred Codec: G729
G.729a Enable: yes
For correct work of incoming call transfer in IP PBX, set following parameters:
DTMF Tx Method: auto
DTMF Tx Mode: normal
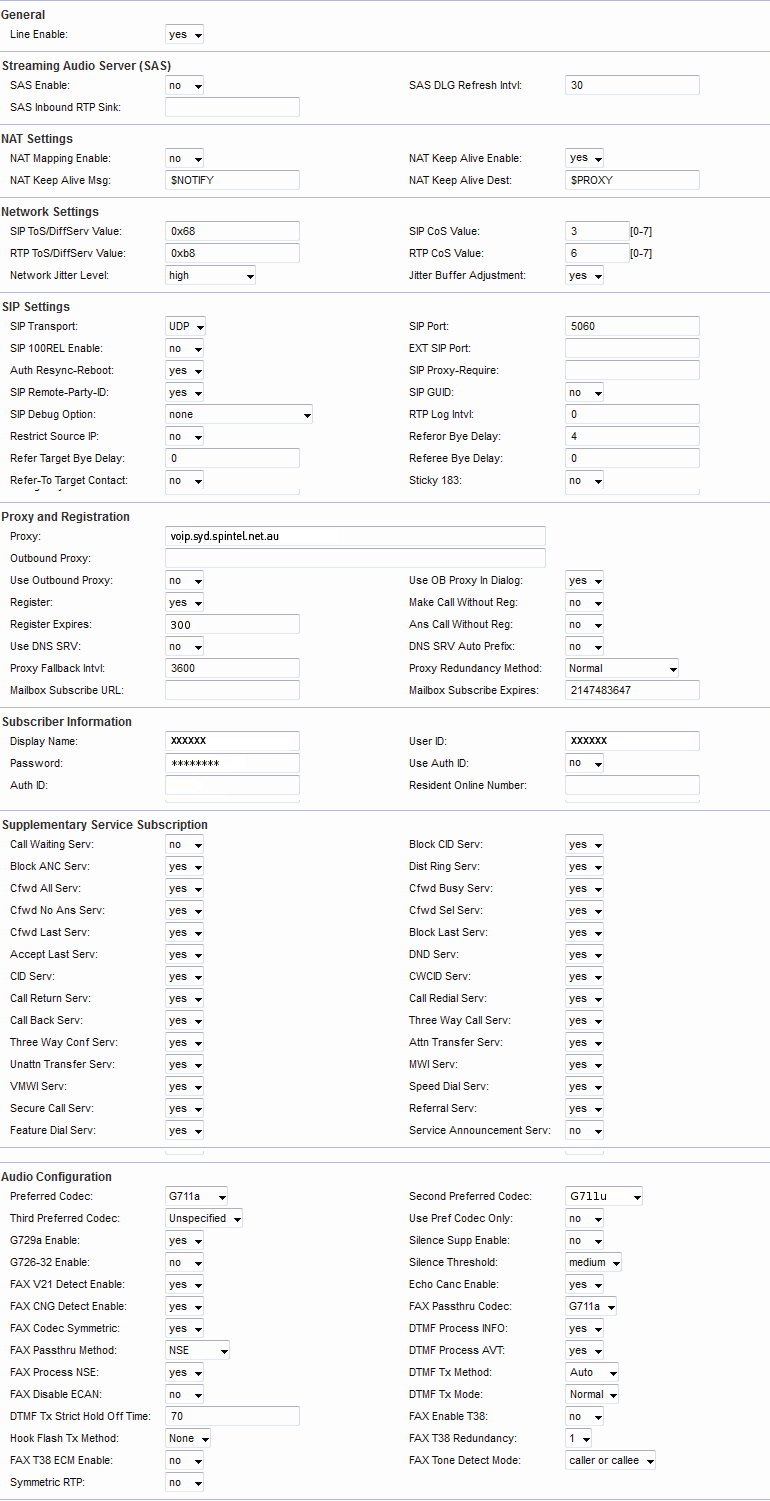

To save settings click Submit